I have been a supporter of Appnitro Machform since the day I found their website. Their application makes things so simple, especially for a designer with little .php experience like myself. Their support, even after years of purchase is unrivaled in my 20+ years of online experience and I cannot recommend them too highly.
M achform is one of the best things that I ever did for my website. It organizes everything beautifully and makes it really easy to keep track of emails, or order forms. For only paying a one time fee you get more than just the software. I had a few questions through the installation process and Appnitro was able to get back to me with in 1 days time or less (even on weekends). I would recommend this software to anyone!
I ’ve been using MF for about 4 years… You guys have provided us a remarkable product and it has made things much easier and efficient for us all to gather information from our clients and customers in a highly elegant and customizable way. Besides that, you have patiently dealt with countless customers of your own with all our issues and demands and have delivered on maintaining your product/standing behind it. Your customer service is stellar and you have always been open to feedback, suggestions, criticisms and feature requests. Wow, you guys are truly set apart form other providers out there and we all have something to learn from you. Your work is truly inspiring. So,… if you haven’t heard it enough, I’ll say it for the rest of us who are too busy to say it themselves: thank you!
If I were on top, I’d vote you guys for small web-based company of the year, maybe of the decade!!
F unctional, affordable, simple web form software with really, really good support. Love what these guys are doing.
I am impressed with MachForm. The software creates great forms, very fast. I would recommend it over Wufoo or other online builders. I was especially impressed by how quickly tech support fixed an html email autoresponder for me. They responded within the same day, allowing me to finish my project on time, with a VERY satisfied client.
J ust want to pop a Feel-Good note out there to say I am MIGHTY impressed with this software! This is now my official go-to software for forms. Worth every penny.
We use it for registration, and then use the forward URL feature to send it to an ECWID -based (Which I also highly recommend) store for payment. Everything you could want was in there (and that you could want to customize) and making forms was too easy.
Good stuff. Kudos!
W e use an eclectic bunch of software to run our business, which is entirely online. Our key criteria are the software delivers 0) secure operation on Linux, 1) a professional experience for our clients, 2) integration with our other software, 3) integration with our design, 4) easy administration, 5) responsive support, and 6) business metrics and reporting. Appnitro’s MachForm rates highly on all of these criteria, and we’ve been pleased enough with its performance to recommend MachForm to others in search of excellent web form submission and results collection software.
S tunning forms in an instant! – It is a truly great product and produces amazing forms with so little effort. It really is as good as it looks – better in fact!
It’s SOOOOO super easy!
A clean interface and an easy way to setup web-based forms for your web site.
M achform has been one of the best tools for our website. For something so simple, you get so much in return. Highly Recommended.
Y our script deserves a ’10′ in my book. You created a fantastic script that does everything we wanted without the bloatware.
T he fitting was very easy. With Machform we could almost complete twice as many requests.
O
verall, I found Machform (Yuniar) very conscientious and professional. This online form is the most advanced, easy to set up and simple I ever seen on the market so far.
You won’t be sorry when you buy this software! Highly recommended!
I
have tried many, many form scripts, some I bought and some were free.
So I just wanted to let you know I love this software, it is VERY easy to use, works like a charm and is without a doubt the BEST form software I have come across!
I
t is the perfect balance between ease of use and flexibility. We have been able to customise the input fields as much as necessary, and so far have come across nothing that was limiting. Your use of ajax makes form management a no-brainer, and the ability to export form entries makes client management an absolute
pleasure. Honestly, I couldn’t tell you a single thing about MachForm that we haven’t liked. Personally, my favourite feature is how tightly you’ve integrated drag-and-drop and form management. From one techie to another, this is a truly solid application.
Dincer Terzioglu, Account Manager
The Design Shed
I
just wanted to thank you all for the quick turn around time. You people are people with integrity.
Once again, thank you very much.
Ted Siuta
L OVE IT LOVE IT LOVE IT!!! Thank you so much for creating such a wonderful tool. I was struggling trying to come up with a decent looking form and after spending just minutes with your product, I have a form that is incredibly useful, professional looking, and better than anything I could have done on my own. Thank you so much!
Erika Phillips
I
purchased your form app and I am really impressed about how powerful and easy it is. I have over 5 years of PHP / MySQL development in web tv broadcasting and in this business time is money !
This app is worth the last cent I spent!
I take great pleasure in writing this note of appreciation. Our long search for a quality developer of forms who can visualize our dreams and make it come true, came to an end in the form of Appnitro – MachForm.
We Would like to place on record our profound gratitude & sincere thanks for the excellent service rendered to us during the pre-sales and after sales support with the highest sense of Professionalism. The Conceptual skills, step by step systematic approach, attention to details & precise documentation, meticulous planning & implementation, all handed out with kindness are the Hallmark of their achievement & Key objectives towards total customer satisfaction.
I would also like to take this opportunity to thank Yuniar and every member of his esteemed Organization.
T
he support on this product has been EXCEPTIONAL! Really.
Note to anyone considering this product: Take comfort in that fact that this product works great and that this support group and forum will help you get up and running in no time. Really. So rest assured that this is a good purchase.
Arron Diaz
F
irst rate product! Purchased, downloaded, installed, created my first extensive form, entered data and exported to excel in 36 minutes flat. And I’m no expert at installing software on a web server!
In less than another hour, I have the form integrated into my Joomla site. Hooray!
Kim Ball
M achForm was the best purchase I’ve ever made for my website. It extremely simple to use, and makes keeping in contact with my customers quick and easy – and in times like these where social media is king, that’s exceptionally important to staying in business. However, the very best thing about MachForm has been the customer service. I had some issues early on trying to do something with my forms that wasn’t normally done. Instead of telling me, ‘Sorry, we don’t do that,” they actually took the time to write code in order to solve my problem! Then they walked me through the step-by-step process of installing it into the backend of my website!! I have never had such a wonderful, personal, friendly, FANTASTIC customer service experience. MachForm will have my business – and that of my website owning friends and family – for life.
Nicole Wright, Owner
Facebook for Your Business
W ow-if you are interested in software that allows you to create a variety of forms for on-line use, than Machform is your answer. I’m swamped with new business start up but had to take 2 minutes to give a shout out to Yuniar’s incredible tech support! Any time i have encountered a problem with being able to use my forms he has been right on top of not just diagnosing my problem but also fixing settings so the problem was fixed with incredible speed! I can’t tell you how happy i am to have found this diamond in the ruff!
M achform has exceeded our expectations from day one. The very first time I used it we got over 4000 responses which led to a number of new coaching relationships. We wondered what had taken us so long to start using surveys. Best of all, Machform is easy to use, feature rich and–importantly–makes it easy for our customers to respond.
Scot McKay
X & Y Communications
I can’t tell you how happy I am with the MachForm product. We loved V. 2 and V. 3 is even better.
We’re a web design firm and often need to get scripts on our clients’ behalf. Believe me, there is a lot of poor quality product out there. That’s why it’s so great to have discovered MachForm. It’s well built, easy to use, powerful, and easy to customize. It’s very clear to me that your programmers take a lot of pride in what they do. It shows!
Keep up the great work!
M achForm is hands down the best online form software! Trust me, I have researched a lot of other form services online until I came across MachForm. Most services host the contact data on their servers which I do not very much approve of and also paying monthly subscription is not my thing. Finally I found MachForm and it has been a sheer blessing. Its robust, powerful, feature rich, elegant and most importantly very user-friendly and simple to use. It has an auto-responder system which I simply love and you can customise the message to look very professional. Thank you guys for such a fabulous product and at a price that’s not only affordable but completely justified for the quality of service you get in return! I wholeheartedly endorse and recommend MachForm
I wanted to say how above and beyond the support team at at Appnitro software has gone to help get my Machform forms on my website up and running. As a photographer, a booking form is very important, and while I can take a great photo, I am not great at the computer end of things. The team at Appnitro lead me through every step and even helped fix my personal mistakes in order to get it running perfectly the way I needed it.
My highest recommendation and appreciation for their services!
I f you’re like me, it’s often you grow somewhat disgruntled with software after discovering missing functionality, ineffective support and poor implementation.
To my delight, MachForm is nothing of the sort but continues to surprise and impress long after you license it!
MachForm is simply in a class of its own!
T o all at MachForm and Appnitro Software,
I spent some 20 years in the IT Consulting field and in that time I have discovered that it is rare to find a group that produce a fantastic product such as MachForms, and also back it up with such OUTSTANDING support!
Your product has literally cut down our Form Design costs by DAYS PER EACH FORM that we have to design, and implementation into our site could not be simpler! Your guidance and assistance is also OUTSTANDING as our forms have several unique features that go way beyond the requirements of a static form and MachForms easily meets those challenges!
Thank You for making our lives here so much easier with such a great product!
I just wanted to thank you for such a quick reply with a working solution to my issue that is now resolved. I am very grateful.
I’ve got to say, I am so pleased that I chose Mackform over all of the other similar products on the market because yours is definitely the best product that I have seen and I done a lot of research before I made my final purchase. No other form building product offers so many standard features at an affordable one-time fee like Machform. Your closest competitor, Wufoo, charges almost 6 times as much for a comparative product and even that’s only for one year.
Once again, thank you for an incredible product.
Y our programmers and staff and nothing less than genius. I am serious when I say that. MachForm is not just a great program, it’s a work of art. We bought several licenses for various projects.
Thanks for the affordable price, great support and awesome forums.
I’ve been into computers since the days of the VIC20 and the mastery of MachForm just blows me away. A warm thank you for all your work, I wish you continued success and great holidays.
One of the easiest ways to boost up the sales of your products is to show the honest recommendations of people that have already purchased them. This is content that rarely changes, and you do not need a dedicated CMS system just to manage it.
In this tutorial we are going to build a XML backed testimonial viewer, which, along with jQuery, can display the set on your product pages.
HTMLThe first step is to lay down the HTML markup of the page. We are setting up a simple one-page site so we can get a better feel of the testimonial viewer in action.
index.php Client Testimonials Powered by PHP and XMLOur new awesome iPhone App is available on the appstore.
At the top of the document, we are including styles.css , the stylesheet for the page, and just before the closing body tag, we are including the jQuery library and our script.js file, which is discussed in the last step of the tutorial.
The #testimonials div is where the magic happens. It is going to hold the client testimonials in the form of LI elements. Only the first testimonial is going to be shown on page load, and the rest will be displayed consecutively with a jQuery fade animation.
PHPBefore inspecting the generation of the testimonials, lets take a look at the XML file that powers it.
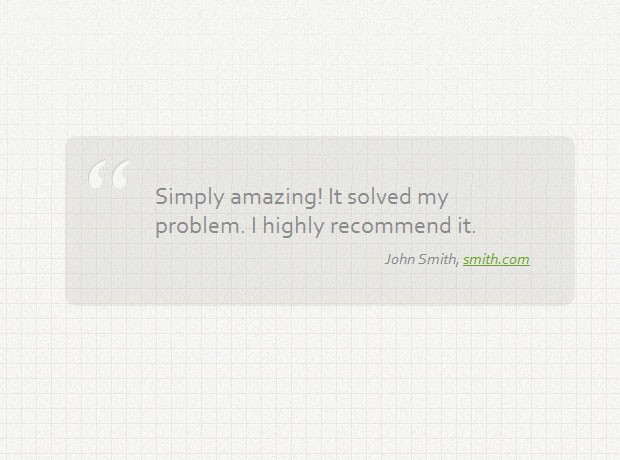
testimonials.xml This has to be the most awesome app I"ve ever used! John Doe jdoe.com Simply amazing! It solved my problem. I highly recommend it. John Smith smith.com A tremendous success. It is like walking on sunshine compared to its competitors. John SmithThe schema of this file is simple - the root testimonials element holds a number of items. Each item has content , author-name and author-url items, where the last one is optional, as you can see from the last testimonial. You can include an arbitrary number of testimonials by just adding more items to this xml file.
But how are we going to transform this into valid HTML? We could parse it with PHP and loop through the items, stitching together the markup, but there is an alternative approach with applying a XSLT stylesheet. This is a special XML based language, which allows us to transform a regular XML file into HTML.
transformations.xml
All the standard programming constructs are supported. You can use for-each loops, if statements and you can even call built in functions (you can learn more at this XSLT documentation site). What we did here, in effect, is to extract the transformation logic from PHP and put it in a separate, presentation file.
There are two approaches when it comes to applying this XSL stylesheet. You can just include it in the XML file itself and leave it to the web browser to generate the HTML markup (all modern browsers support XSL transformations), or do it on the server side. Luckily, PHP has great support for XSL and it is really easy to use.
index.php $xmlFile = "xml/testimonials.xml"; $xslFile = "xml/transform.xml"; $doc = new DOMDocument(); $xsl = new XSLTProcessor(); $doc->load($xslFile); $xsl->importStyleSheet($doc); $doc->load($xmlFile); echo $xsl->transformToXML($doc);The snippet above resides in the #testimonial div of index.php. It prints a set of LI elements after applying the XSL stylesheet to the XML document with all the testimonials. To the browser (and search spiders) everything looks like a regular HTML page.
 CSS
CSS
Now that our markup is generated, lets style it. As the subject of the tutorial is primarily the back-end, we will only take a brief look at the CSS code.
styles.css #page{ width:800px; margin: 0 auto 120px; } #topBar{ height:62px; position:relative; } #logo{ width:194px; height:62px; position:absolute; top:0; left:0; background:url("../img/logo.jpg") no-repeat; } #navigation{ position:absolute; list-style:none; right:0; top:15px; } #navigation li{ display:inline;} #navigation li a{ text-decoration:none; font-weight:bold; float:left; padding:10px; margin-right:10px; font-size: 17px; } #iPhone{ height:400px; margin:60px auto 0; background:url("../img/iPhone.png") no-repeat; } #iPhone p{ display:none;} #testimonials{ width: 375px; padding: 45px 45px 35px 90px; background:url("../img/quotes.png") no-repeat 20px 20px rgba(178,178,169,0.2); min-height:90px; -moz-border-radius:12px; -webkit-border-radius:12px; border-radius:12px; } #testimonials li{ display:none;} #testimonials li:first-child{ display:block;} #testimonials ul{ list-style:none;} #testimonials p.text{ font-size:24px;} #testimonials p.author{ color: #878787; font-size: 16px; font-style: italic; text-align: right; margin-top:10px; } #testimonials p.author a, #testimonials p.author a:visited{ color:#6aa42a; }The code above styles the page, and hides all the testimonials (which are simply LI elements inside of the main UL). After this, by using the first-child selector, we show the first one by default. It will be down to our jQuery code to cycle through the rest and show them consecutively.
jQueryIn the jQuery part of the tutorial, we will create a simple script that will loop through the testimonials and show them one by one with a fade-in animation.
script.js $(document).ready(function(){ // Hiding all the testimonials, except for the first one. $("#testimonials li").hide().eq(0).show(); // A self executing named function that loops through the testimonials: (function showNextTestimonial(){ // Wait for 7.5 seconds and hide the currently visible testimonial: $("#testimonials li:visible").delay(7500).fadeOut("slow",function(){ // Move it to the back: $(this).appendTo("#testimonials ul"); // Show the next testimonial: $("#testimonials li:first").fadeIn("slow",function(){ // Call the function again: showNextTestimonial(); }); }); })(); });By increasing the value passed to the delay method, you can control the screen time for each testimonial. Moving the active one to the back (instead of keeping an index) simplifies the function implementation and allows us to call showNextTestimonial recursively.
With this our Client Testimonials viewer is complete!
ConclusionYou can use this script as a quick solution to displaying testimonials on your product pages. You can even modify it to include ratings, stars, reviews, and other kinds of custom data. At the end, it is all down to editing an XML file.
In just a few steps, you will be collecting and publishing your testimonials or reviews. Beginners and pros alike will appreciate the wealth of flexible features refined over 4 years from user feedback and requests.
SEE HOW EASY IT IS TO GET STARTED WITH STRONG TESTIMONIALS
Premium features only available in Strong Testimonials — Paid version:
- Import reviews from: Facebook, Google My Business, Yelp, Zomato and WooCommerce
- With our dedicated 3-rd party importer, you can now automate importing, managing and displaying of your testimonials.
- Custom Testimonial Collection Form Fields
- The perfect example is with a car review website. Using the Custom Fields extension, you can gather detailed testimonials that include information such as car manufacturer, model, and horsepower.
- Multiple Testimonial Collection Forms
- You can now create multiple forms to collect testimonials from your website visitors and customers. You can easily create new forms to gather testimonials for different types of products on your website. There is no limit to the number of forms you can create or use.
- Schema.org Markup
- The extension that will help you get **** in your Google search results for your business.
- Advanced Views
- _ For example, one view to display your testimonials, another view for the testimonial submission form, another view for a slideshow widget._
- Properties
- You are not a fan of calling your product reviews testimonials? Then use this extension to replace the default text (testimonials) with another one such as reviews or ratings.
- Captcha anti-spam form Protection
- Protection for spam is something all websites need
- PRO templates
- Beautifully designed & pixel perfect templates, ready to use with to showcase your testimonials. Don’t loose clients with a poor design.
- Priority email support
- Support and updates for 12 months.
This plugin provides a few designs with only basic style options for background color and font color. Everything else will be inherited from your theme.
Some templates have light & dark versions and other options. If you want to customize things like fonts, margins and borders, you will need custom CSS.
Testimonial Submission FormThis plugin provides one form with custom fields. Customize the form by adding or removing fields and changing properties like the order, label, and placeholder.
Send custom notification emails to multiple admins.
Submit the form via Ajax for use with plugins like Popup Maker .
Displaying TestimonialsEverything happens in a View . Instead of learning multiple shortcodes with dozens of options, a View contains all the options in a simple, intuitive editor that no other testimonial plugin has.
Create unlimited views. For example, one view for a form, another for a static grid, another for a slideshow, and so on.
Display a view using a shortcode or the widget.
A variety of templates are included that work well in most themes.
For ultimate control and seamless integration, copy any template to your theme and customize it.
The template function will add a view to your custome theme templates:
Privacy and GDPR
By default, this plugin:
Try these plugins too- Wider Admin Menu lets your admin menu b r e a t h e.
The plugin connects to our website through an API call (https://strongtestimonials/wp-json/mt/v1/get-all-extensions) in order to request a list of available extensions.
IT DOES NOT SEND ANY DATA NOR DO WE COLLECT INFORMATION FROM THE REQUEST
Our privacy policy can be found at this URL https://strongtestimonials.com/privacy-policy/
Скриншоты УстановкаActivate the plugin. Look for «Testimonials» in the admin menu.
Часто задаваемые вопросы What are the shortcodes?— To display your testimonials as a list or a slideshow, or to display the form. The first step is to create a view which manages all the options in an easy-to-use (some call it fun!) editor.
— To display the number of testimonials you have. For example:
Read some of our testimonials!
— To display the average rating of all your testimonials. Includes stars!
Can I show more than one testimonial in the slider (i.e. a carousel)?
Yes. you can show 1, 2 or 3 at a time and you can scroll 1, 2 or 3 at a time.
Can I add testimonials from YouTube, Twitter, Instagram and Facebook? Can I change the fields on the form?
Yes. There is a custom fields editor to add or remove fields, change field details, and drag-and-drop to reorder them.
After the form has been submitted, can I redirect them to another page or display a custom message?
Can I set the status of the newly submitted testimonial?
Yes, either pending or published.
Can I reorder my testimonials by drag and drop?
Can I change the fields that appear below the testimonial?
Yes. In views, change these custom fields in a few clicks.
Can I display a large version of the featured image in a popup?
Yes. This requires a lightbox so if your theme does not include one, you will need a lightbox plugin.
Will it automatically use my existing testimonials?
No. If you already have testimonials in another plugin or theme, you will have to re-enter them. Why? Because every theme and plugin stores data differently.
ОтзывыSorry but immediately uninstalled due to no captcha in the plugin by default. Anything with a form should have captcha. You can get it but you have to pay for it. I cant even test if I want to buy pro without captcha. Going to a different plugin.
I’m not a programmer and guilty of clicking on something wondering what it will do only to have contact support for help to undo! I can’t remember a time I have received such thorough, complete and understandable support. I would recommend this plugin just to experience the support if you need them, but on its own, the plugin is great too. I have three areas on the home page I attend to that I am able to have clients read testimonials. One of my favorites is the slider at the bottom of the page that gives a sampling of testimonials and offers the option to read more just by clicking the link. Very-very impressive!! THANK YOU SUPPORT FOR BEING THERE FOR ME!!
War eines der besten Plugins für Feedbacks. Leider kam irgendwer auf die bescheuerte Idee sämtliche Funktionen, Einstellungen etc. in die Pro-Variante zu packen. Dem Autor spenden oder zusätzliche Funktionen kaufen ist kein Problem. Aber absolut grundlegende Dinge aus einer Basis-Version zu nehmen ist...sorry... unter aller Sau. Und tschüss. 🙂
Рассказываю, как сделать на сайте ротацию отзывов клиентов, покупателей о ваших услугах и продуктах с помощью бесплатного плагина Testimonials Widget и не только.
Для чего нужны отзывы на сайтеПродающий сайт без отзывов клиентов сейчас выглядит немного странно. Не секрет, что именно отзывы часто помогают принять окончательное решение при покупке товаров или услуг, повышают доверие. Есть много исследований на эту тему, которые доказывают положительное влияние отзывов на принятие решений о покупке. Коллеги из Hidden Marketing недавно поделились конкретными цифрами.
Как видим, отказываться от столь мощного инструмента продаж не очень разумно, мягко говоря.
Как работают отзывыВизуально система отзывов представляет из себя форматированный список, часто в виде динамической карусели или слайдера, включающий в себя непосредственно текст отзыва, какой-то медиаконтент, информацию об авторе, иногда какие-то контакты, оценку товара, услуги.
Технически работа системы отзывов выглядит так: после приобретения товара или услуги покупателю предлагается оставить отзыв, он заполняет некую форму, отправляет продавцу, который ее модерирует: утверждает публикацию, отправляет на доработку или запрещает. После утверждения отзыв появляется на странице товара / услуги и в общем списке отзывов.
На практике такие полностью автоматизированные системы нужны редко. Крупные российские продавцы интегрируются с отзывами Яндекс Маркета, зарубежные с Гугл Ревьюс и др. Среднему сайту часто вполне достаточно простой формы обратной связи, ручной обработки и публикации отзывов.
Отзывы в ВордпрессРазработка обычно сводится к регистрации нового типа записей (CPT) с каким-нибудь логичным названием testimonial, верстке списка, страницы отзыва и его привязке к товарам или услугам.
Напомню, регистрация новых типов записей в Вордпресс осуществляется в файле functions.php следующим образом:
// Регистрация CPT add_action("init", "create_post_type"); function create_post_type() { register_post_type("testimonial", array("public" => true, "has_archive" => true, "exclude_from_search" => false, "publicly_queryable" => true, "labels" => array("name" => "Отзывы", "singular_name" => "Отзывы", "menu_name" => "Отзывы", "all_items" => "Все отзывы"), "supports" => array("title", "editor", "thumbnail", "custom-fields", "page-attributes"),)); }
Сделать простую систему отзывов на Вордпресс можно без программирования и плагинов.
Для этого достаточно создать страницу или запись, назвать ее «Отзывы» и разрешить комментирование. Простейшая и полностью автоматизированная система отзывов готова!
В премиум-темах Вордпресс системы отзывов часто интегрированы в тему.
Например, в одной из моих любимых тем Бридж ротация отзывов реализована в виде слайдера.


Другие коммерческие плагины.
Если вы занимаетесь продвижением каких-то продуктов или услуг, используя свой сайт на WordPress, или просто хотите дать новым посетителям повод подольше задержаться на вашем блоге, то публикация отзывов от довольных клиентов, заказчиков, или читателей будет отличным способом увеличения конверсии. Мнения других людей не только позволяют дать потенциальным клиентам и заказчикам информацию о том, какие преимущества вы предлагаете, но и помогут вызвать чувство доверия к вам.
Добавить отзывы на сайт под управлением WordPress достаточно просто, можно воспользоваться для этого специализированный плагин, например, такой как Testimonials Widget.
Хотя, в его названии и присутствует слово «Widget», но это полноценный плагин, который позволяет создавать отзывы, организовывать их, и добавлять на сайт.
Основные функции Testimonials WidgetTestimonials добавляет новый раздел в панель администратора WordPress. В этом разделе вы можете создавать посты, которые будут выглядеть как цитаты от клиентов, включающие такие поля, как: имя автора, должность, изображение, URL-адрес, цитата. Вы можете добавить их на свой сайт, при этом в абсолютно любое место, используя виджеты, шорткоды, или фильтры. Они будут отображаться в виде немного стилизованного списка, но вы можете сделать собственное визуальное оформление с помощью CSS.
Плагин не требует много места, он содержит только небольшой файл CSS, и несколько десятков строк JavaScript кода, которые добавляются при необходимости. Им довольно легко управлять, он достаточно гибкий, а также содержит множество дополнительных опций, таких как:
- Шорткоды для размещения внутри контента;
- Отображение в слайдере и облаке тегов;
- Добавление нескольких виджетов на одну страницу или пост;
- Уникальные CSS классы;
- Возможность комментирования;
- Распределение по категориям или тегам;
- Стилизация с помощью фильтров и файлов шаблонов;
- Поддержка WP-PageNavi;
- Экспорт и импорт настроек.

После установки и активации Testimonials Widget, вы увидите новый раздел в панели администратора WordPress, который будет называться «Testimonials». В нем содержится список всех созданных вами отзывов. Чтобы сделать новый, просто нажмите на кнопку «Add New» в самом верху окна.
После этого, перед вами откроется окно редактора постов с некоторыми пользовательскими полями для заполнения. Поле заголовка предназначено для имени автора, а поле контента для содержания. Ниже будет находится раздел с дополнительными полями для заполнения. Эти поля не обязательно заполнять, но вы можете сделать это, если хотите добавить такие данные, как: должность, местонахождение, электронный адрес, компания и URL-адрес. На самом деле, эти дополнительные поля могут быть использованы для чего угодно, они будут отображаться вместе с содержанием, так что могут быть адаптированы под различные цели. Кроме того, плагин дает возможность легко добавить изображение автора, воспользовавшись копкой «Задать миниатюру».
НастройкаЕсли вы перейдете в раздел «Testimonials -> Settings» в панели управления WordPress, то увидите несколько различных вкладок с опциями, предназначенными для глобального изменения конфигурации. Эти опции действуют на все виджеты, но только созданные после внесения изменений. К сожалению, все они не на русском языке, что несколько усложнит настройку для плохо владеющих английским языком людей, но данная инструкция поможет получше разобраться в них.
Во вкладке «General» представлены общие настройки. Здесь вы можете отключить кавычки, в которые заключается содержание и убрать отображение стандартной надписи. Кроме того, можно включить или отключить отступы у списков, выбрать их расположение, включить шорткоды и видео, исключить стандартный CSS, указать цель для URL тега .
Во вкладке «Fields» можно скрыть определенные поля. Вы можете скрыть все поля, которые присутствуют в редакторе постов, такие как электронная почта, должность, и даже цитата. Имейте ввиду, что эти параметры могут быть отдельно перезаписаны в настройках виджетов, так что это полезно только тогда, когда вы хотите сделать кардинальные изменения.
Вкладка «Selection» позволяет фильтровать определенные типы постов и таксономий. Если вы хотите включить только определенную категорию, можно ввести ее название в поле «Category Filter». То же самое можно сделать с тегами и отдельными постами. В случае с постами, потребуется ввести их идентификаторы, в соответствующее поле, через запятую. Кроме того, есть возможность выбрать стандартное ограничение, от которого зависит количество отзывов, выводящихся на страницу одномоментно.
Вкладка «Ordering» очень проста, она позволяет изменить порядок, в котором будет выводится список. Вы можете отсортировать его по содержанию, по имени автора, или по любым мета-полям, таким как электронная почта и местонахождение. Выберите поле, по которому хотите осуществить сортировку, из раскрывающегося списка. Затем, выберите «descending» или «ascending» для сортировки по убыванию или возрастанию соответственно. Есть возможность случайной сортировки списка, чтобы ее включить, просто установите флажок на «Random Order?».
Вкладка «Widget» позволяет изменять настройки для перетаскиваемого виджета. Вы можете изменить название, количество символов содержимого, ширину и высоты, удалить пробелы, и задать множество других параметров, которые будут влиять на отображение. Здесь следует отметить, если он уже был создан ранее, вам потребуется сначала удалить его, а потом создать заново, чтобы изменения вступили в силу.
Вкладка «Post Type» позволяет изменить экран редактирования и архив. Здесь вы можете разрешить посетителям комментирование, изменить стандартное название, которое будет отображать архив и страница одного сообщения. Ну и последняя вкладка «Reset», предназначенная для импорта и экспорта настроек, а также их сброса до стандартного состояния. Импорт и экспорт будет полезен в том случае, если у вас не один сайт на WordPress, и вы хотите подключить плагин сразу ко всем. С этими опциями не придется каждый раз вносить одинаковые изменения.
Добавление отзывов на сайтТеперь, когда вы прошлись по всем основным опциям, изменили их по своим предпочтениям, и смогли сделать несколько тестовых постов, у вас появляется возможность использовать три разных способа, чтобы добавить их на свой WordPress сайт.
- Использование виджета. Перейдите в раздел «Внешний вид -> Виджеты», найдите нужный и перетащите в боковую панель. Вы можете изменить конкретные параметры перед сохранением.
- Использование шорткода. Стандартный шорткод для вывода списком , но можно использовать и дополнительные. Их можно найти в разделе «Settings», во вкладке «Shortcode Examples».
- Использование функции. Вы можете воспользоваться встраиванием прямо в файлы шаблона, при помощи функции «testimonialswidget_list()» или «testimonialswidget_widget()». Дополнительная информация о применении API находится в документации.
Если вы решили использовать виджет, то у вас есть 5 вариантов на выбор: последее, категории, архивы, слайдер, облако тегов. В принципе, для них будет вполне достаточно тех глобальных опций, что вы изменили до этого. Тем не менее, есть возможность перезаписать настройки по умолчанию при помощи выпадающего меню, доступного перед сохранением. После изменения настроек остается только нажать кнопку «Сохранить», и виджет появится в той панели, в которую вы его перенесли.
Если вы решили использовать шорткоды, а это наиболее гибкий вариант, поскольку позволяет поместить отзывы на любую страницу или отдельный пост, то опции здесь нужно задавать с помощью специальных параметров. Помимо этого, существует несколько различных шорткодов, позволяющих отображать их по-разному, таких как:
- – Архив месячной давности;
- – Вывод категорий;
- – Последнее;
- – Ротация или статика;
- – облако наиболее часто используемых тегов;
- – отображение примеров наиболее популярных тегов.
Каждый шорткод может содержать определенные атрибуты, которые предназначены для применения любой функции из тех, что содержит этот плагин. Например, предположим, что нужно вывести список с лимитом в 100 символов, из категории с названием «myproduct», в случайном порядке, со скрытым полем местоположения. Это будет выглядеть таким образом:
Или, допустим, нужно вывести слайдер, в котором будет только 10 записей, под тегами «new» и «best», с высотой 200 и заголовком «Hello World». Для этого нужен такой шорткод:
Это лишь несколько примеров, на самом деле, плагин позволяет использовать намного больше комбинаций, полный список которых можно найти, зайдя на его страницу в каталоге WordPress.
Единственное, что осталось сделать, это изменить стиль отображения на наиболее подходящий под ваш вордпресс сайт. По умолчанию, все отзывы находятся внутри специального элемента HTML blockquote и каждое поле мета имеет собственный класс. Таким образом, они могут быть легко изменены с помощью пользовательских CSS стилей.
ЦеныЗаключениеПлагин Testimonials Widget считается одним из лучших решений для добавления отзывов на сайт под управлением CMS WordPress, как по мнению пользователей, так и по количеству активных закачек. В нем есть все, что может понадобиться любому пользователю, и даже больше. Благодаря своей гибкости, он способен подстроиться практически под любую задачу. Кроме того, даже его бесплатная версия постоянно обновляется и поддерживается разработчиками, решающими проблемы, в том числе, и через общение на форуме. Все это качественно выделяет плагин среди других подобных решений, именно поэтому его и устанавливают на свой вордпресс сайт многие пользователи.